Showing posts with label BJD. Show all posts

Sunday, 5 February 2012

» Blue Photo Doll with Wings : BJDcollectasy.com

» Blue Photo Doll with Wings : BJDcollectasy.com: "Blue Photo Doll with Wings
Photo by doll owner Zagzagael"

'via Blog this'

Blue Photo Doll with Wings
Photo by doll owner Zagzagael


1/3 size Unicorn Doll


Doll Customization

koneko3

blue-in-ice-wig

Dollstown Elf Soph (lower lip modified) "Helka"

kerli and doll

The Snow Queen Project

Special project: Outfit designed by Charie Wilson based on 
gracefaerie designs patterns resized for Impldoll ImpStar girls.

The face-up and photography were done by BJDcollectasy. 
Wig and glass eyes were provided by JpopDoll. 
A Youtube video and article are also available of the doll. 

gracefaerie designs:
http://www.gracefaerie.com


 Project page with video:
http://www.bjdcollectasy.com/articles/the-snow-queen-project.html


JpopDoll:
http://www.jpopdolls.net/store/home.php


Bobobie Purple Sprite 1

Bobobie Blue Sprite 2


Yakki by Ravendolls with Dollheart Outfit 
White resin Yakki with Thaasa II body. 
She is dressed in a limited Doll
heart outfit with Angel Boots and has German glass eyes and 2 different wigs.


Yuli by Ashley
Yet to be released, first Photos of new Yuli.


Close-up of 'Fiona' (Alice in Labyrinth Chloe head)

Alice in Labryrinth Chloe Head on Flexi body.

Tired Ballerinas after a Photo Shoot!


A Ghostly Goodnight


Duet from Tattered Ballerina Series

Tattered Ballerina 'Elsbeth'


Tattered Ballerina Solo

Let Them Eat Cake


Choyanbe in the DREAMING of DEGAS dress

Warrior outfit


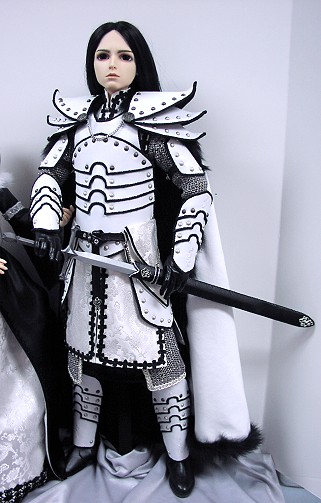
Warrior and Maiden Couple


Tattered Fairytale 

Fairytale

Doll

Doll

Dolls

Idex dolls

Click on images to take you to source for more information:0)

love, peace & light
Trace
oxo

~Restringing Tutorial~ : BJDcollectasy.com

~Restringing Tutorial~ : BJDcollectasy.com:

 "Learn how to clean and re-string your doll.
This guide will show how easy it can be. 

Don’t be intimidated!

In the tutorial, she was disassembled, cleaned with a Mr. Clean Magic Eraser, and re-assembled. 
The re-assembly of your doll can vary somewhat by company. 

 The general information in the video is true for most BJDs."

~Paperclay Doll Eyes~

~Paperclay Doll Eyes~ : BJDcollectasy.com: "Making Paperclay eyes for your doll is very simple. The eyes shown here were colored using pencils and acrylic paint, but feel free to explore other materials and use your imagination! The Paperclay used here was purchased at an A.C, Moore craft store, and it is easy to find at art and craft supply places. The Mr. Super Clear used to seal the eyes came from Junkyspot. The paints and pencils came from Dick Blick."

'via Blog this'


 1. Roll some Paperclay into little beads.  
Since this takes very little time and uses very little clay,  make a bunch of paper beads.  

To gauge the size of the beads, compare them to a doll eye of the same size that you want to make. 
Then set all the beads aside to dry. 
Usually they dry in one day, but drying may take longer depending on bead size and atmospheric conditions.


2. Select two balls to use for the eyes.  You can test them in the doll first to see how they fit.

To work on them, you may find it helpful to stick the bead in a kneaded eraser which will hold it in place.


3. A screw or nail head can be used as a guide to trace an iris onto the bead.
Compare the screw or nail head size to the iris of a doll eye of similar size
to see whether it is the right size for your project.


4. Draw or paint your eye. Here is one in-progress. This one is being colored with pencils.
5. After you finish both eyes, spray them with Mr. Super Clear flat lacquer.
This protects the eyes.
The eyes could also be glossed.
Many art materials can be used in making your eyes,
and the looks you can achieve are limitless.

Have fun :0)

love, peace & light
Trace
oxo


How to Make Noah's Doll

How to Make Noah's Doll [English]: "How to Make Noah's Doll"

'via Blog this'

Ever wanted to make a BJD ?
The link HERE will show you a making process of Noah's ball-jointed dolls step by step.

What is a ball-jointed doll?

It is a kind of a doll with ball-and-socket joints in its body, arms and legs. Limbs and head are joined together by loops of elastic.
There are many variations in the way to join each part of a doll.
Fig.01 shows the construction of Noah's doll.
Arms are attached by elastic running through the armholes and torso.
Each leg has its own piece of elastic, and in both legs loops of elastic run from the ankle up through the knee, the leg-hole and up to the head, both loops being hung on a hook inside the neck.
Other ends of the elastic band are attached to the small "S" shaped hook and hanged on the wire strung inside the wrists and ankles respectively.

No doll can stand up by itself when it hasn't been made well-balanced in its construction.


(1) Drawing up a plan

For a start, draw up a plan in same size, the front and the side, taking account of the balance of each part, and the size of joints. This doll will be 2 feet tall.

(2) Making the core

Here we don't use a mold. We introduce the way of using Styrofoam (foam polystyrene) for the core.
Cut the all parts from the lump of Styrofoam in a size 10mm smaller than finished size.

If you can find Styrofoam balls in adequate size on the market, you may use them for joints.


 (04) All the parts are arranged except hands and feet, which don't need the core.
The neck will be made after the shape of the head is settled and then attached to the head.

Put marks the position of features in the face, and the top and bottom, right and left in the limbs.


Continue the tutorial HERE

love, peace & light
Trace
oxo